Creating Seasons in Art
Seasonal Pricing is now available in Art!
Seasonal pricing is a strategy some property managers utilize to account for large swings between different times of the year.
The Seasonal Price settings are located in the Rate Settings and Min-Stay Settings in Art.
Creating Seasons in the Rate Settings
Once you open the Rate Settings, you will see the Seasons toggle button.
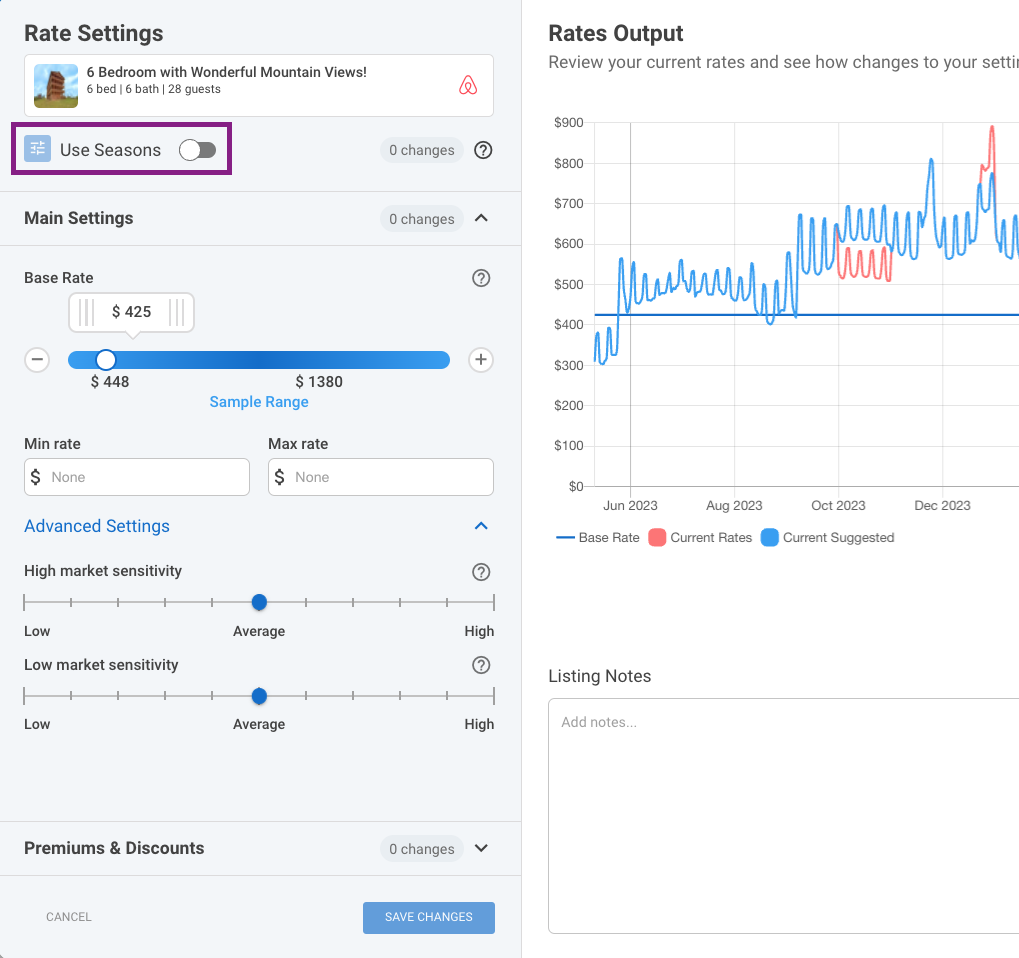
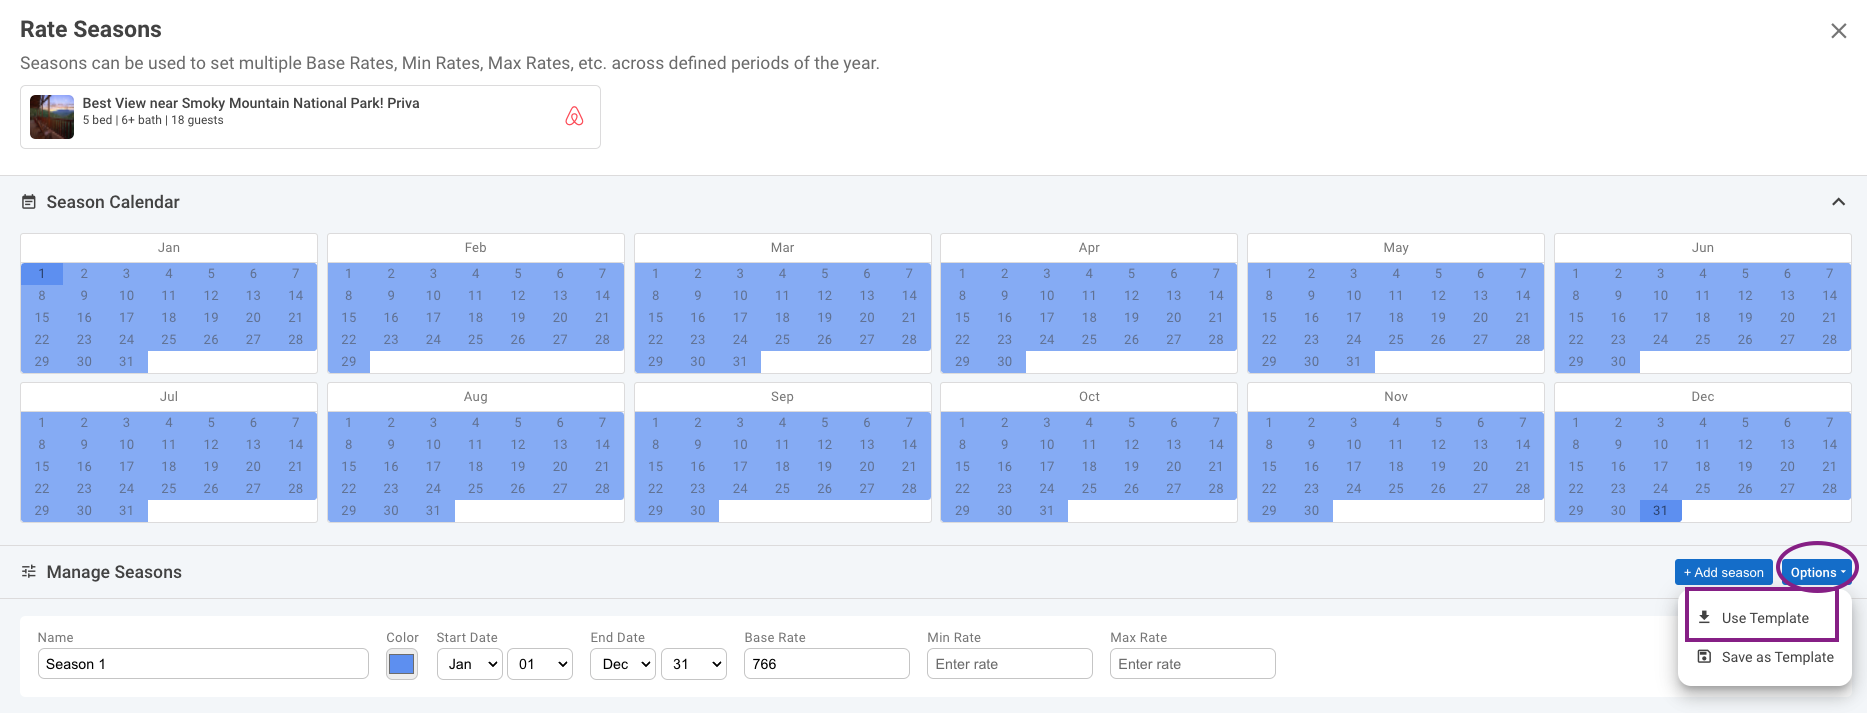
After you toggle seasons on you'll be taken to a calendar view, where you can begin to define your seasonal date ranges.
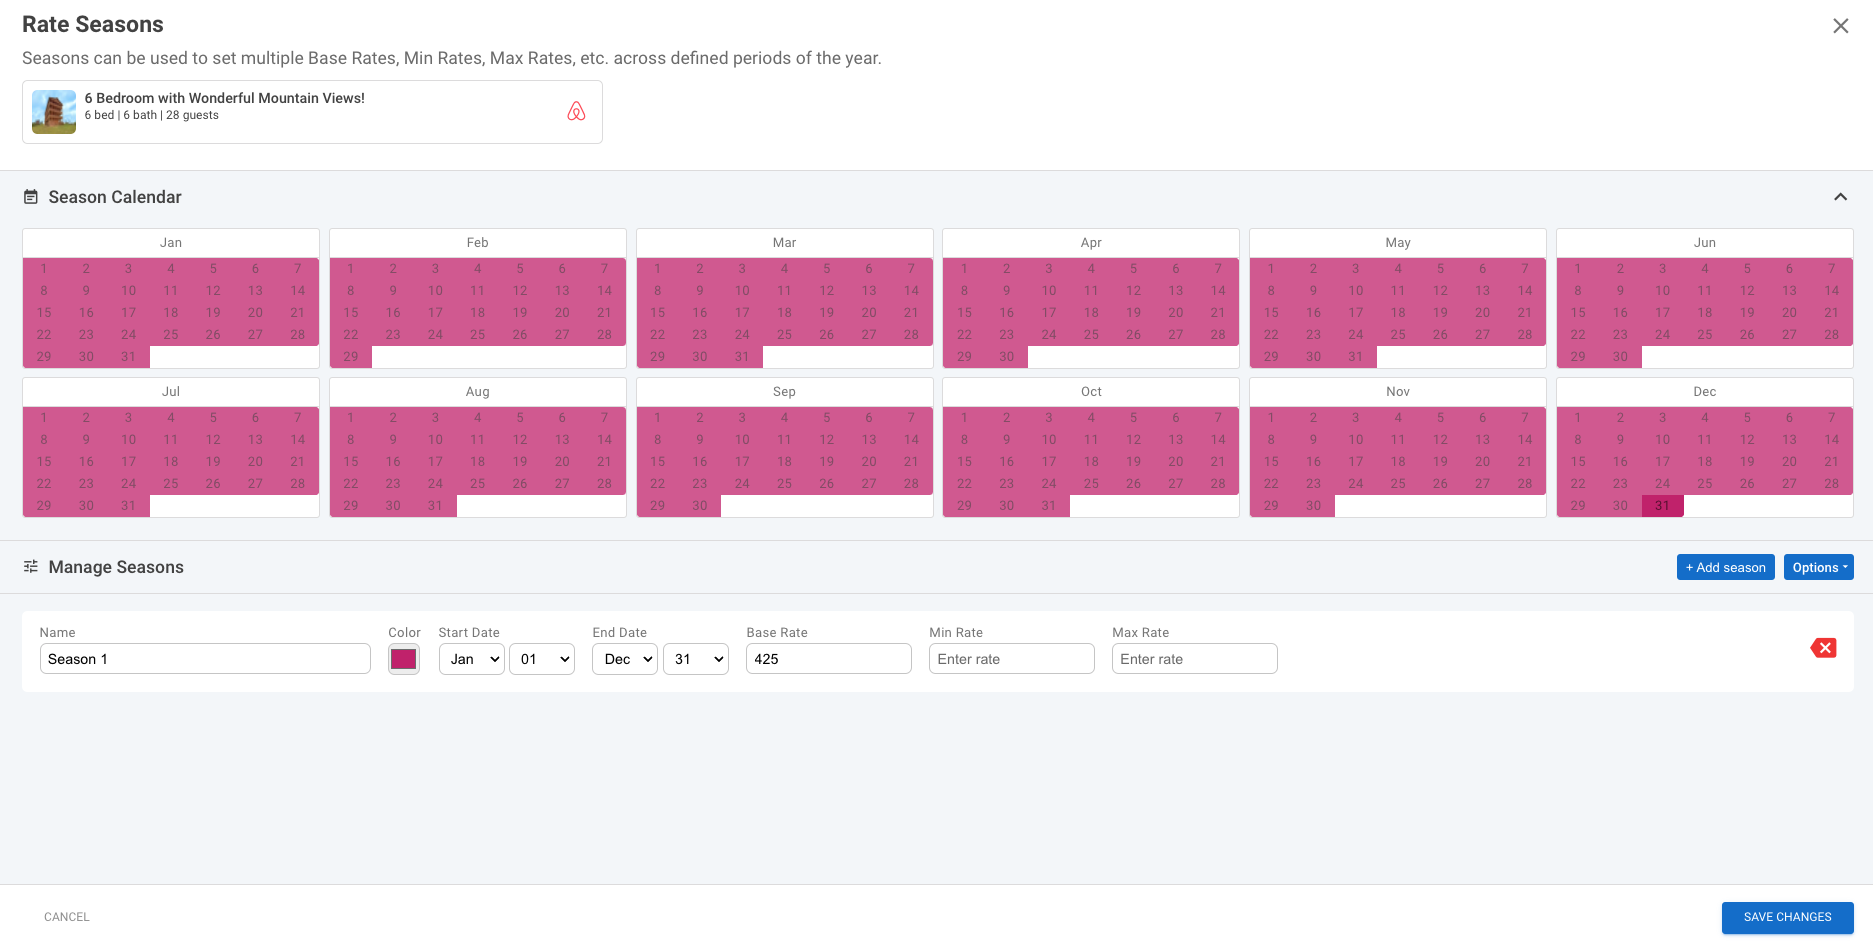
- All dates must be account for.
- No dates that overlap or gaps in date ranges.
Pro-Tip
Seasons cover multiple years. If there are holidays you are account for that float over different dates per year, it would be best practice to extend the range to include all dates that might apply in future years. In example, Thanksgiving can fall from Nov. 22nd - 28th in any given year. To account for this in seasons, you might extend the range from Nov. 20th - Nov. 30th, to account for this fluctuation.
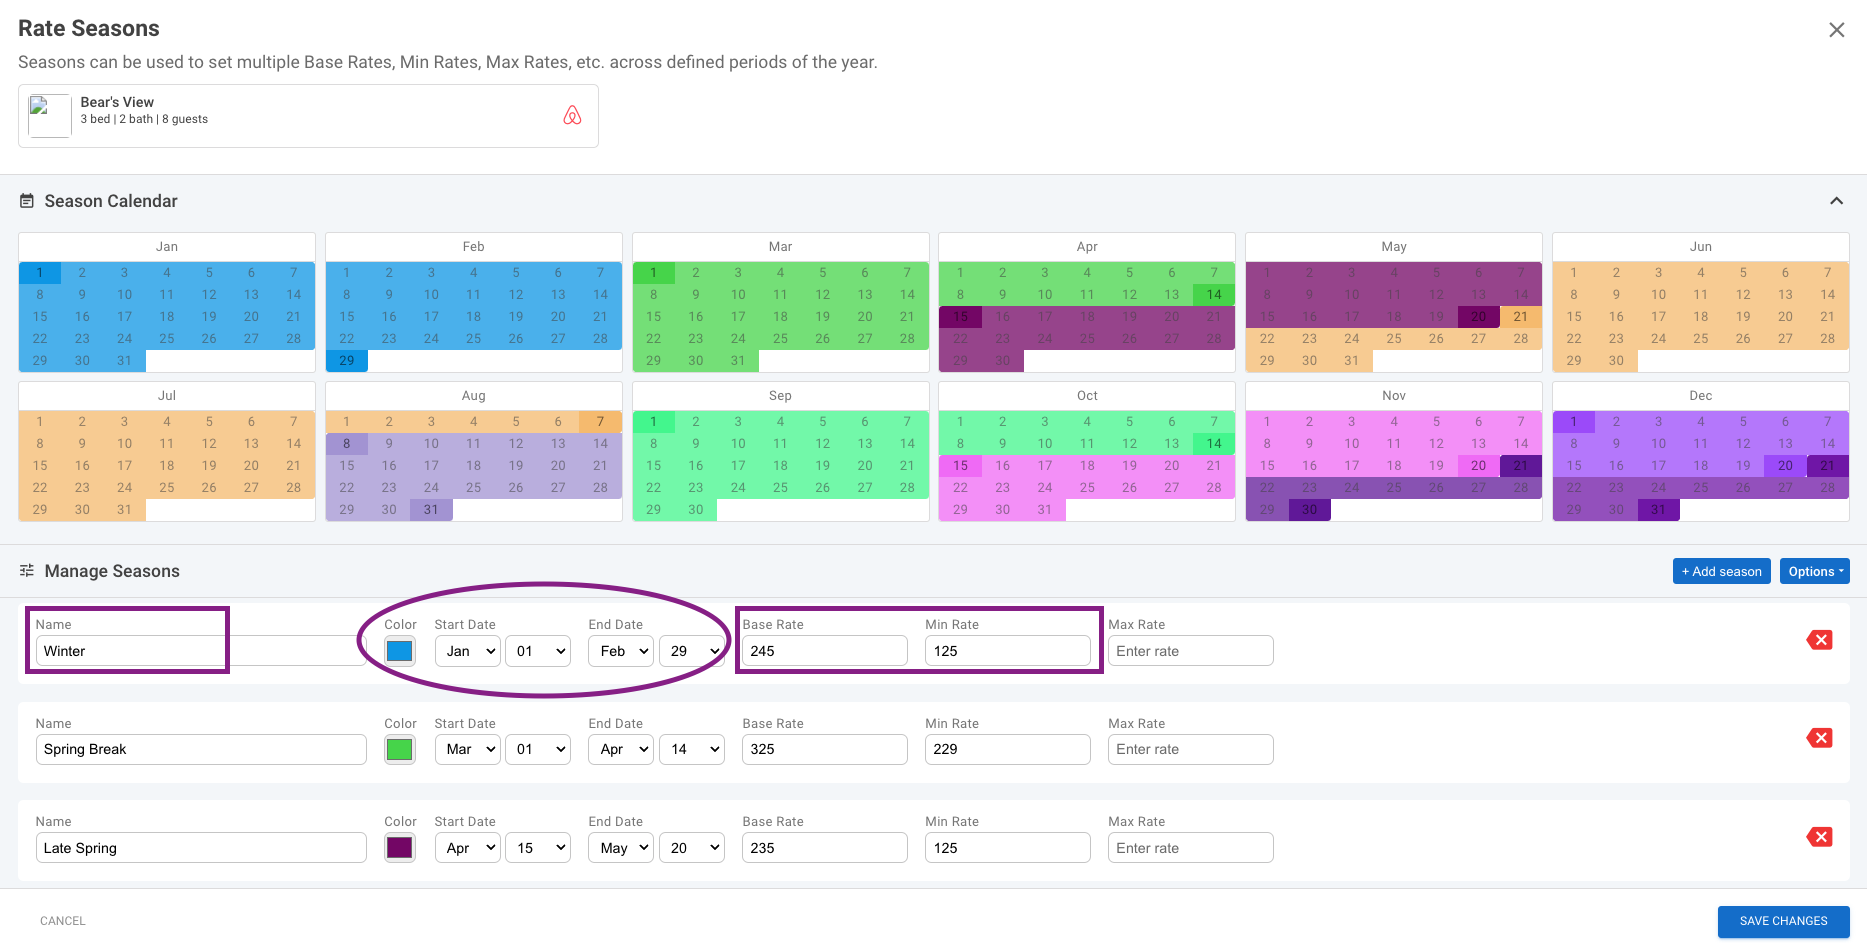
Once in the Seasons screen, you can begin to build out your date ranges and given them a name. Pick a color for that date range. Then set the Base Rate, Minimum Rate and Maximum Rate (if applicable).
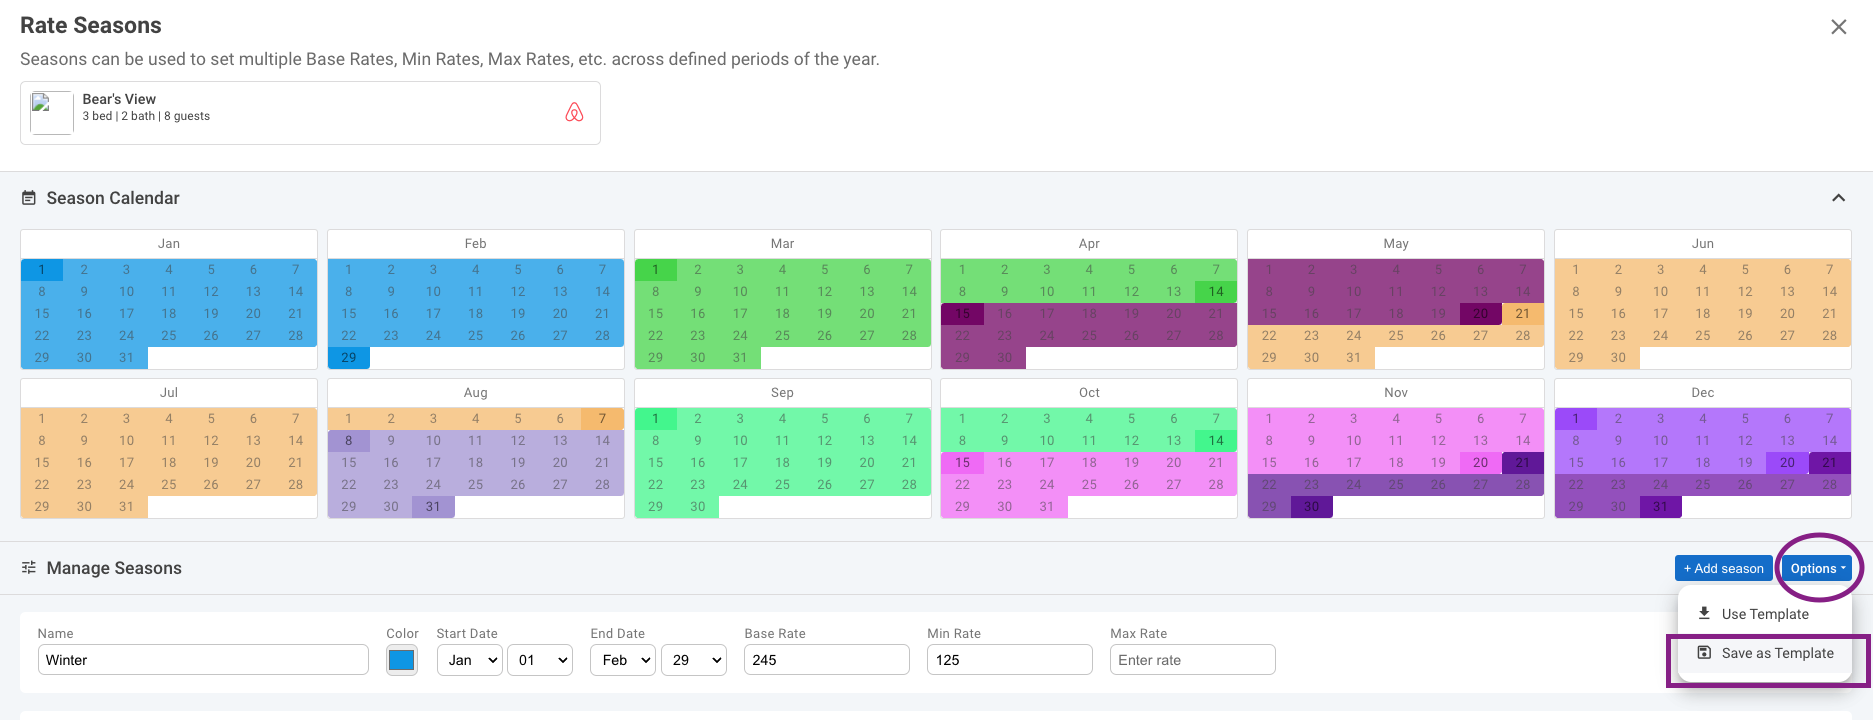
Once you have a full calendar configured you can select Options, and save your Seasons as a Template. Then you can use the same date template for other properties that follow the same seasonal dates.
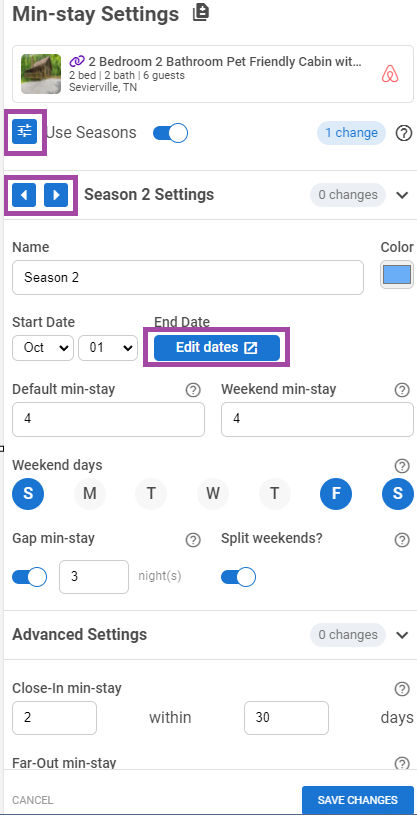
After you save your template, you will save your Rate Seasons and save the Global Rate Settings. Then you can open your Global Rate settings, and review the rates. Make any edits to the date ranges by hitting the Manage Rate button, at the top of the settings. The directional arrows will allow you to toggle through your seasons. You can also edit the rates by hovering over the date ranges in the Global Rate settings.
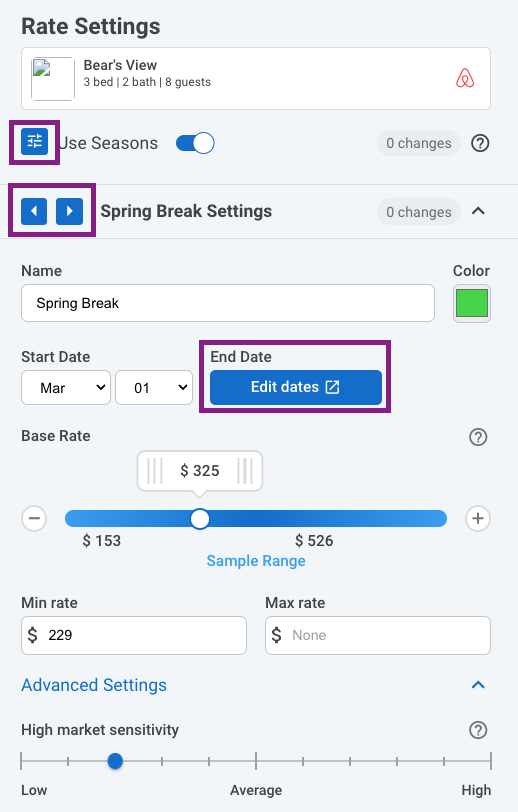
The market sensitivity sliders can be configured per season. You will use the direction arrows to toggle through the seasons to set these. The Premiums & Discounts will continue to work across all seasons.
After you've reviewed your pricing, you're ready to move on to the next property. If you'd like to use the same date range template, you will select options and select Use Template.
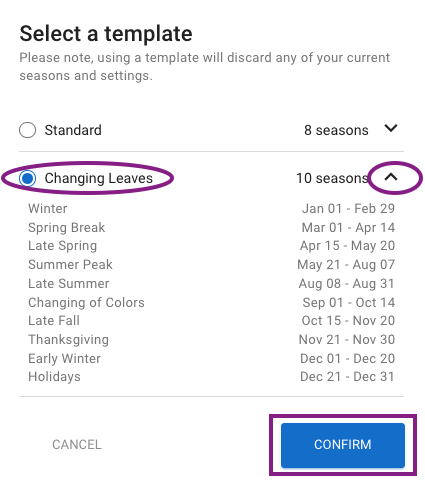
Select the Season you want to use. You can use the arrow on the right to open up the seasonal date ranges to verify you're selecting the right template. Select Confirm to save the template to the property.
Adding and Creating Seasonal minimum stay in the Min-Stay Settings.
Once you open the Min-Stay Settings, you will also see the Seasons toggle button.
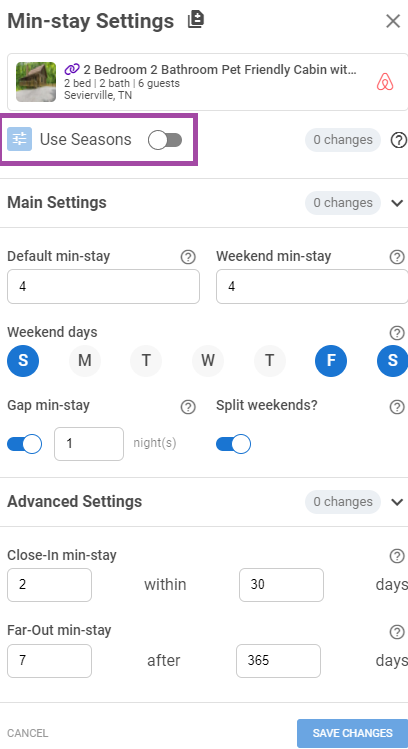
After you toggle seasons on you'll be taken to a calendar view, where you can begin to define your seasonal date ranges, create and save a new template or choose the same Template used in the Rates Settings then set the Minimum and Maximum Stay (if applicable).
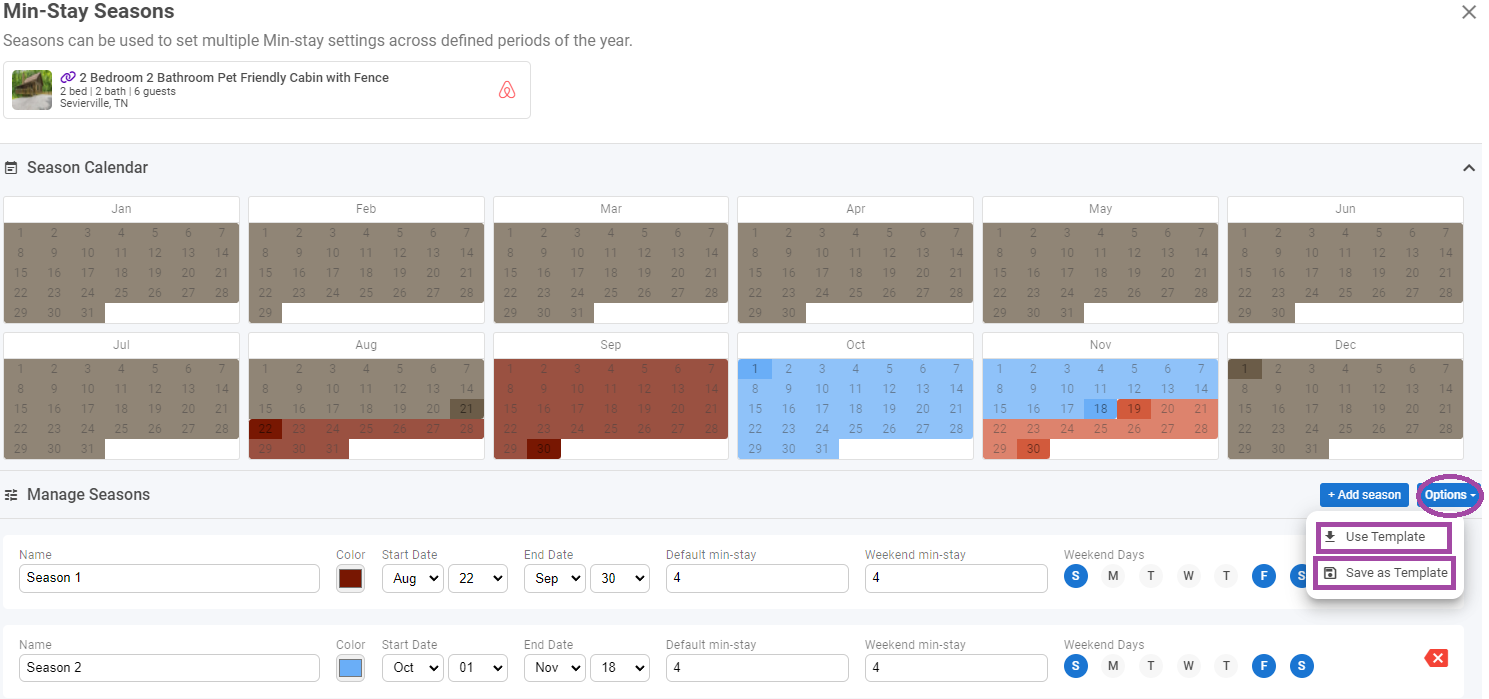
After you save your changes, you will save your Min-stay Seasons and save the Global Min-stay Settings. Then you can open your Global Min-stay settings, review and make any edits to the date ranges by hitting the Manage Rate button, at the top of the settings. The directional arrows will allow you to toggle through your seasons. You can also edit the min stays by hovering over the date ranges in the Global Min-Stay settings. Please remember to click Save Changes once you are done updating.
Now you're ready to set your pricing for the next property!