Using Groups In Art
Manage Collections of Listings in One Place

Written by Valerie Clagett
Updated at December 14th, 2022
Groups are new functionality available in Art!
With Groups, you can add any listings to a collection, and then make adjustments to the group easily, including tags, min and max stay rules, pricing changes, and more.
Ideas about how you might use Groups include these, but there's no limit to how to benefit from this tool:
- Listings that have similar regulations or HOA rules in place
- Listings that are similar in proximity to local high-interest attractions
- Listings that are in a desirable location, such as oceanfront, or ski-in ski-out
- Listings that have key amenities such as private pool, hot tub or include a golf cart
- Newly remodeled properties that should have increased pricing
Let's Get Started With Groups
The Folder Menu Icon is the Groups Navigation tool. Click here and + Create New to make a new group. You will also see any groups you have already created listed under the button.
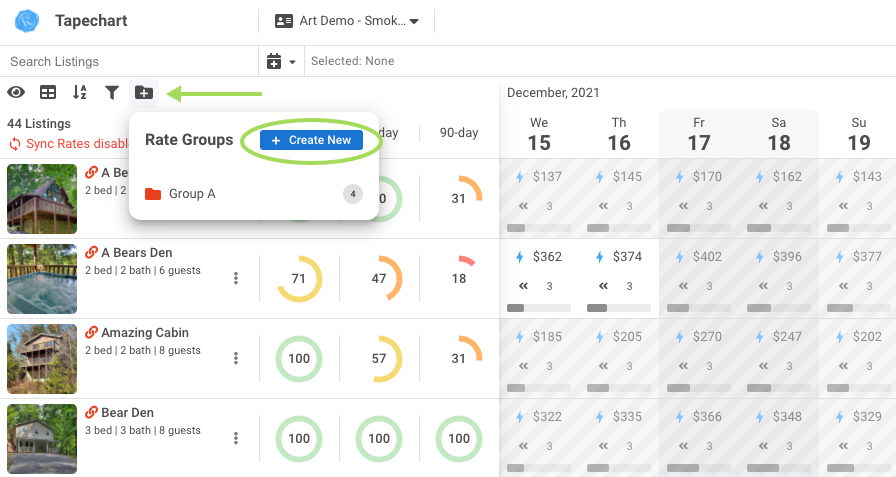
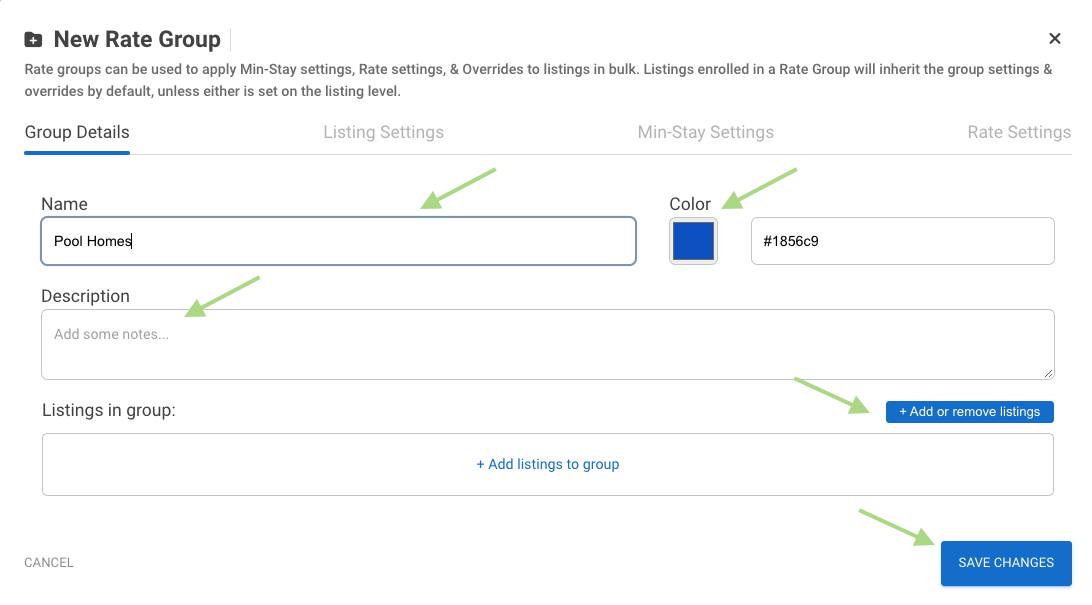
Creating a new Group will bring you to the setup screen, where you can add all the following information about the Group: Name, Color, Description. Next click Add or remove listings. All the listings will show at the bottom of the window, but you will not be able to add listings that are already in another group, they will be greyed out. Then hit Save.
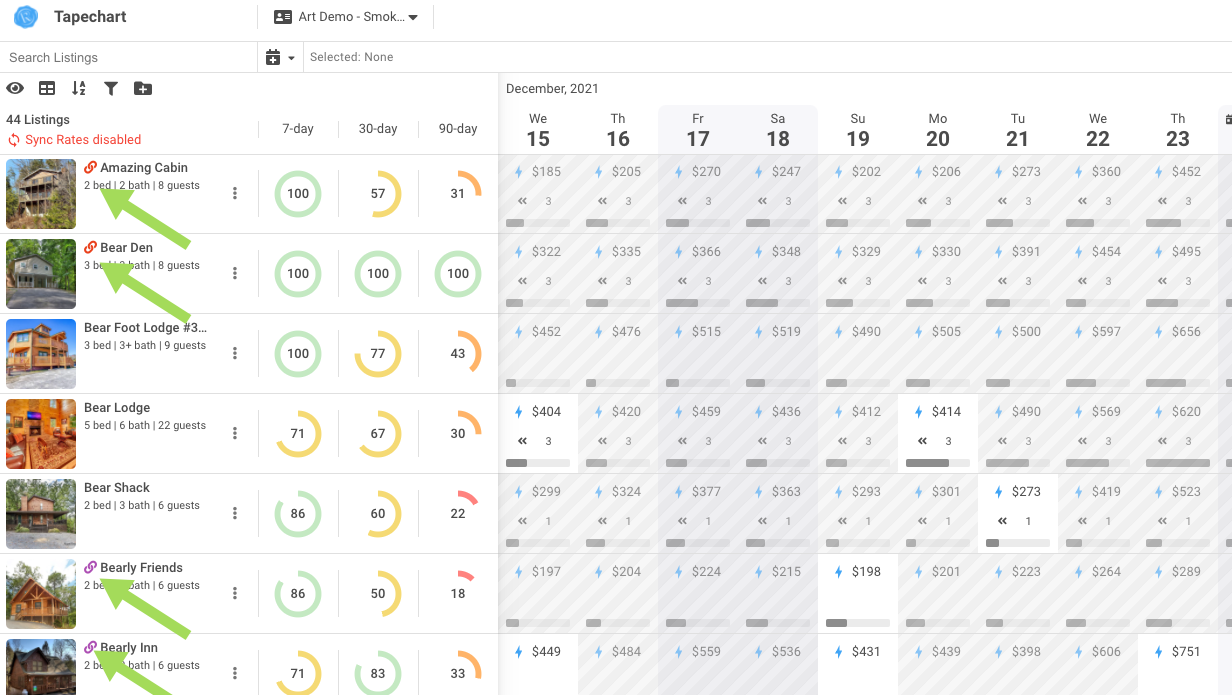
The color you select for the Group will show on the listings in the Tape Chart View:
Now that we have a Group created, next we will go over the adjustments that can be made in bulk to listings within a Group.
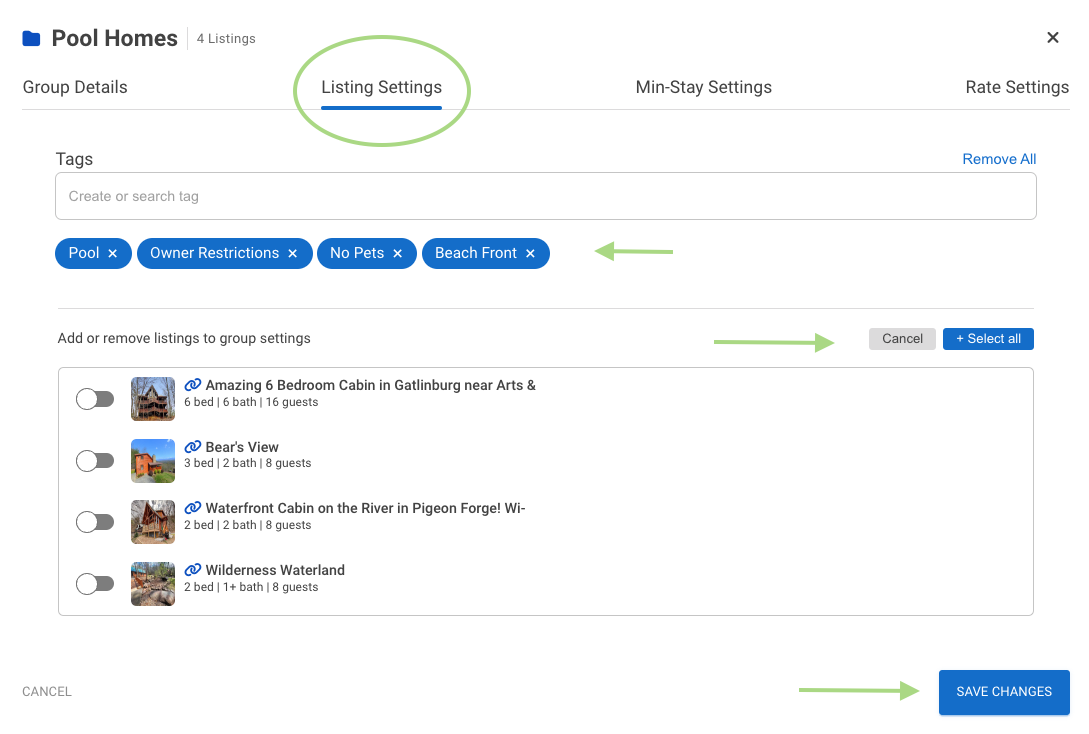
- Add Tags to Listings In Bulk! Using the Listing Settings, you can add tags that are already created, or make a new tag and apply it to all the listings in the Group. Add your tags, then add the properties you want the tags to apply.
-
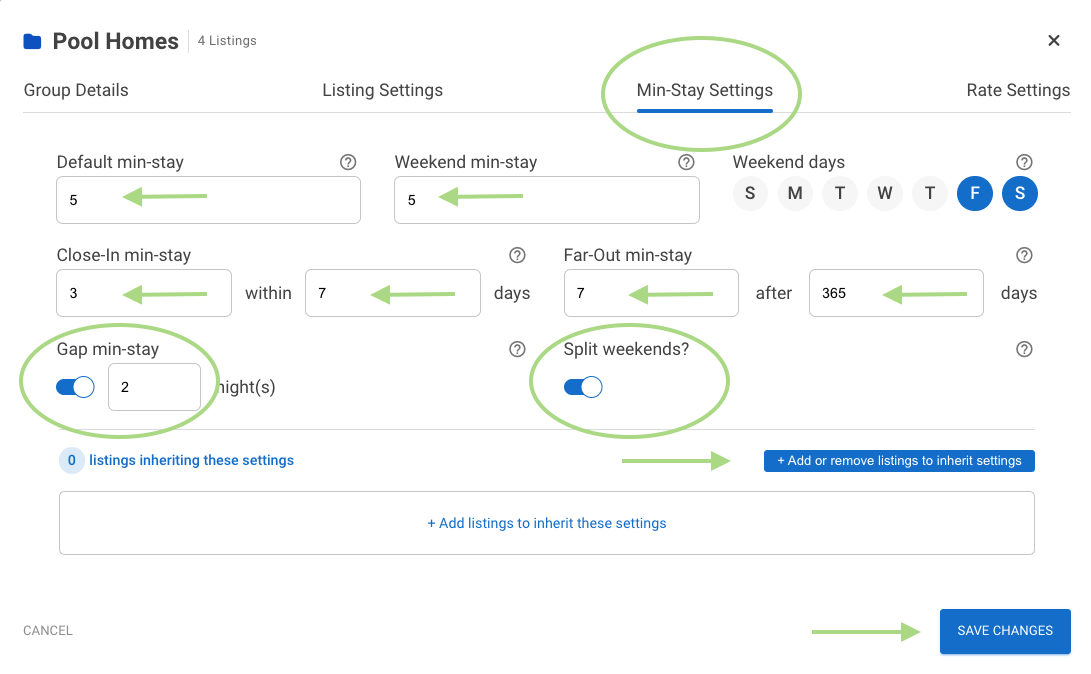
Manage Minimum Stay Settings and More In Bulk! Using the Min-Stay Settings you can adjust the following for some or all listings in the Group.
- Default Min Stay
- Weekend Min Stay
- Define Days of Weekend
- Close In Min Stay with Number of Days
- Far Out Min Stay after Number of Days
- Gap Fill Min Stays
- Split Weekends, Yes or No
-
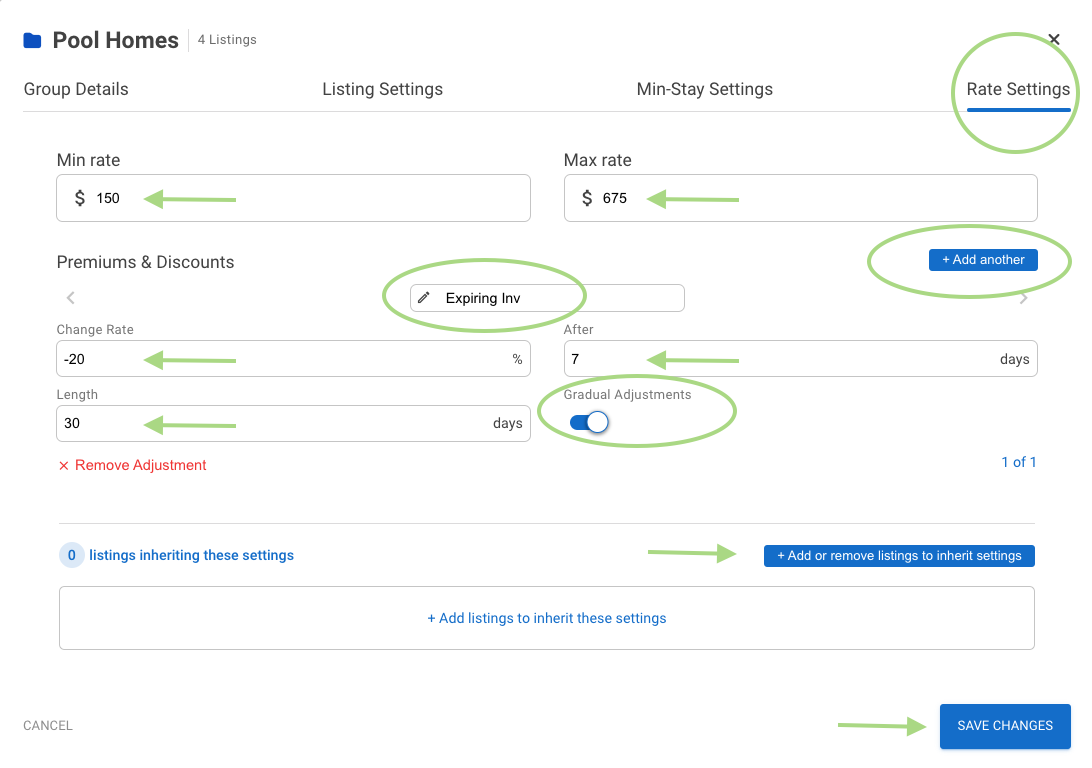
Manage Rate Settings and Time-Based Premiums and Discounts! Using the Rate Settings you can adjust the following for some or all listings in the Group.
- Minimum Rate
- Maximum Rate
- Create Up to 10 Premiums and Discounts that adjust rates over time, either as a flat rate or gradually over the time you have defined. This can be used to manage expiring inventory, or far advanced bookings.
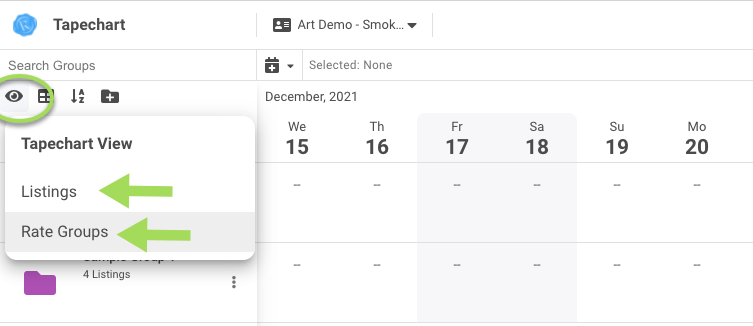
Navigating between tapechart listing and Groups views.
From the top navigation on the tapechart, you can switch from listings to Group views here:
When you are in the Group view, you can also select dates just like the tapechart view and make edits!